On the occasion of presenting my first cake to the in-laws, I tried to go chic. Annette was given this Red Velvet cake with cheesecake filling and cream cheese frosting.
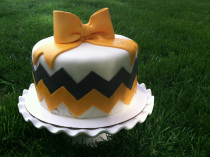
Interested in learning how to do a classy chevron stripe around your cake? I followed this tutorial:
http://ericaobrien.com/blog/2012/08/diy-chevron-cake.html
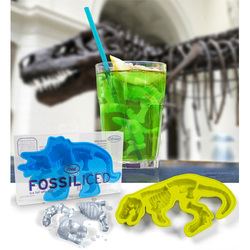
Once upon a time I came across this fabulous set of ice cube trays knowing full well they were inefficient to use as ice cube trays. Next thought, Fondant Mold! I sprinkled a bit of cornstarch/powdered sugar mix into the mold, squished in my prepared fondant, then popped the tray into the freezer. About five minutes later I pulled the tray back out, pulled out my perfectly molded dinosaur skeleton, trimmed off the edges, and gum glued it to my cake.
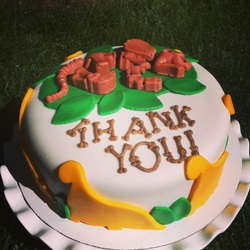
Love the final result! what better way to say thank you than with dinosaurs and cake?
I love these giant fondant bows! They add such class and a nice finishing touch to cakes. Learn how to make one in Wilton's Course 3: Fondant and Gum Paste at your local Hobby Lobby.
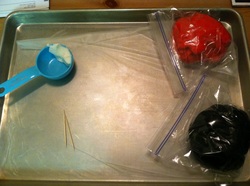
What you need:
- Wax paper or a smooth, Crisco-ed surface
- Extra Crisco
- Toothpicks
- Red fondant
- Black fondant
- Gum Glue (Not Pictured)
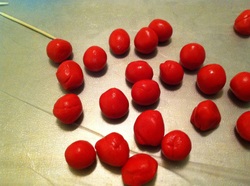
Portion off the red fondant into small balls.

Squish into round or oval discs, whichever you prefer. These will form the bodies for your ladybugs. I flipped back and forth between the two, making ladybug a bit unique.
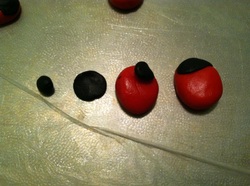
Portion out the black fondant into much smaller pieces. Flatten the black fondant into half sphere or oval disks. Dab a bit of gum glue on an end of the body and attach the black disk to make the head.
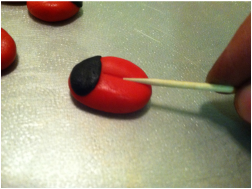
Once the head is attached, use a toothpick to make a grove down the back of the ladybug's body to make the "wings"
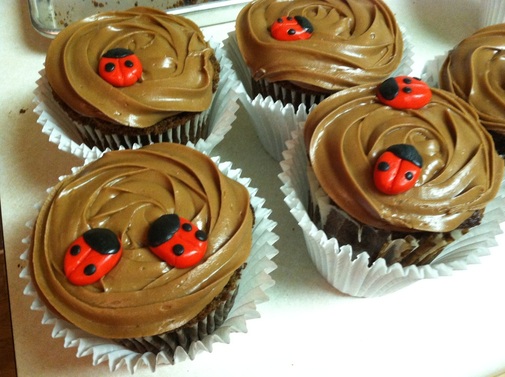
After making the wings, attach smaller black dots to make the ladybug's spots. Once your ladybugs are complete, place them on your cake, or cupcakes, for some added spring fun!

 RSS Feed